Thursday, August 25, 2011

Hummus and Quinoa: A Match Made in Heaven

Earlier this summer, I went to an outdoor baby shower at Brooklyn Bridge Park. It was blazing hot, but that did not stop my appetite. The mom-to-be's mother in law is an amazing cook (and owner of a deli in Ithaca, NY that specializes in Middle Eastern food). She put out an amazing spread of grain- and vegetable-based dishes that were perfect for a hot afternoon, as well as a variety of dips and spreads.

So of course, when I got home, I fought the heat exhaustion and attempted to recreate a quinoa salad with herbs and beans (as well as creamy hummus using the Cook's Illustrated method). The quinoa salad served at the shower was extremely light and fluffy, with fresh herbs, crisp celery, black beans and artichoke hearts tossed in a lemon vinaigrette. I gilded the lily and added feta cheese and additional vegetables to my version. Frankly, I wished I left them out. This salad is best dressed right before serving, as it gets a tad soggy after sitting. And of course, it is best eaten outside, with friends, in the sunshine.

Quinoa and Black Bean Salad with Fresh Herbs

Ingredients

1 C. Quinoa, rinsed

1 3/4 C. Water

1 Lemon, juiced

.25 C. Olive Oil

2 Scallions, thinly sliced

1 stalk Celery, finely diced

1 14 oz. can black beans, drained and rinsed

.25 C. Minced herbs (cilantro, mint, basil or some combination thereof)

Salt

Freshly Ground Black Pepper

Method

In a small pan, bring the quinoa and water to a boil, cover and turn down heat to a simmer. Cook for about 15 minutes, or until the water has been absorbed.

In a large bowl, whisk together the lemon juice and olive oil.

Add scallions and celery and beans and toss to coat. Add slightly cooled quinoa and herbs.

Season with salt and pepper, and toss to combine.

Tuesday, August 9, 2011

Danish Potato Salad

I have yet to meet a potato salad I don't like. Scratch that - a homemade potato salad I don't like (some of the grocery deli case specimens are just gross). With mayo, with Miracle Whip, with a herbed vinaigrette, it's all good in my book.

So when I had my first taste of Danish potato salad this summer, I was hooked. And it's a perfect farmers market salad this time of year. You can literally find almost every ingredient there: new potatoes, jewel-like radish, crisp cucumbers, leafy celery, slender scallions, a variety of herbs and maybe even farm-fresh eggs. I used red new potatoes in my version, but they were a wee bit firm, so I'd suggest using a potato with a higher moisture content (that will break down a bit after cooking). I also used a bit too much scallion, so would also suggest tasting your vegetables as you go (How much of a bite do those onions have? Does the radish taste mild or bitter?) so you can adjust quantity as needed.

Sadly, summer is speeding by, so do yourself a favor and hit up your farmers market soon so you can try this salad the way the Danes intended.

Danish Potato Salad
Apparently, a true Danish potato salad has what's called a cooked dressing. I cheated and used prepared ingredients.
Ingredients
4 C. Diced white potatoes
Water for boiling
Salt for boiling
2 T. Cider vinegar
2 T. Dijon mustard
1 C. Miracle Whip
Splash of pickle juice (optional)
2 Eggs, hard boiled and chopped
1/2 Cucumber, peeled, de-seeded and chopped
5 Medium Radishes, sliced into thin half moons
1/4 C. Red onion or scallion, chopped
Salt and ground black pepper to taste
Handful of chopped herbs (parsley, tarragon) (optional)
Method
Boil potatoes in salted water until just cooked through. Reserve one cup of the cooking liquid.
A la the Julia Child Method, drain and combine hot potatoes with vinegar and about a third of the reserved cooking liquid. Allow to sit and cool for 10 minutes.
In a large bowl, whisk together the mustard, Miracle Whip and pickle juice (if using). Add potatoes and toss to coat. Then add the egg and chopped vegetables, herbs (if using). Combine well.
Add additional salt and ground black pepper to taste. Chill before serving.

Wednesday, June 29, 2011

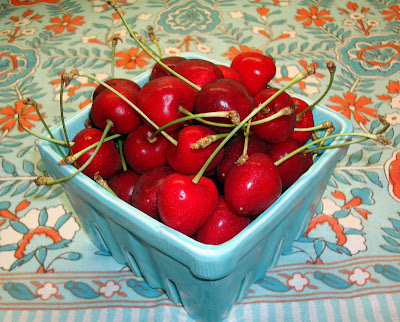
Life Is Just A Bowl Of Cherries

I'm not going to lie - it's been a hectic spring, and is shaping up to be a crazy summer. But I am taking a page from the song Life's Just a Bowl of Cherries and reminding myself to "live and laugh at it all."

Because it's actually the best time of year at the local farmers markets. Late season rhubarb next to strawberries; early cherries a sign of other stone fruits to come. All crying out to be tucked inside one signature dish....pie.

Unfortunately, I am not much of a baker. But with the Fourth of July around the corner, a new pocket pie gadget and pre-made crust in my freezer, I may just break out of my comfort zone.

Until then, my farmers market buys look fantastic in the stoneware Farmers Market Basket from Anthropologie!

Life is just a bowl of cherries

So live and laugh,
Laugh and love
Live and laugh at it all!

Tuesday, April 26, 2011

Hilton Head Farmers Market

Earlier this month, I escaped the dreary New York weather and spent a week on Hilton Head. Like last year, we spent most of the week cooking and eating in. After all, who wants to leave the wide expanse of beach? I was happy to discover that the island had just started a Friday farmers market. Although market day happened to be near the end of my week's visit, I couldn't resist checking it out. The market is held on Honey Horn Road, near the Coastal Discovery museum. Despite being early in the season (even for down south), there were several vendors selling produce, including "local" strawberries. But for those not looking to buy more groceries to take back to the beach house, there are plenty of other interesting items.

Like fancy jewelry. When's the last time you saw pearl necklaces for sale at your local market? Or a guy in a toga (the vendor from Castra Rota Gourmet Foods was in costume)? I even ran across a vendor that also is present at my local market in Westchester! How weird is that?

Even if you're not in the market for food to take home, the Hilton Head Farmers Market is a great place to dine. Seriously, there were vendors selling everything to pot stickers to pork, beignets to baked goods. And many offering free samples! I tried deep fried peanuts and vegetable scones. We ended up buying a savory crepe from Claudine's Creperie and multiple pastries from The Midnight Bakers, including a pineapple strawberry danish I devoured on site. In my experience, while restaurants on Hilton Head can be hit or miss, everything at the farmers market was a hit. In fact, I would plan a trip next year just to go back. If you go:

The market address, as listed on the website, is 70 Honey Horn Plantation Road. My GPS could not find the address (tried to take me through a gated community) so if using a navigation device, try plugging in "Coastal Discovery Museum" as a point of interest instead.

Wednesday, March 30, 2011

Butternut Squash Soup with Kale and White Beans

They say March comes in like a lion and out like a lamb, but it's March 30 and still in the 30s and 40s in New York City...with an April Fool's rain/snow storm on its way. I am trying to look on the bright side because cooler weather is also soup weather. As I've said in the past, once the thermometer hits 70, I rarely turn on the oven or stove. So I've been stockpiling treats in my freezer, from slow oven-roasted campari tomatoes to individual servings of soups of all kinds. At last count, I've crammed 10 containers of soup into the freezer at work, and at least a third are butternut squash with white beans and kale.

I was a little late to the "cook beans from scratch" party, having assumed canned beans were just as good. But then I plunked down $9 for a bag of Rancho Gordo cannellini beans (after finding them at the Blue Hill Cafe). These are like the filet mignon of white beans, as meaty as a bean can be.

The heirloom beans add a nice texture to the smooth butternut squash puree and chewy kale, making the soup a filling lunch any time of year.

Butternut Squash Soup with White Beans and Kale

Ingredients

1 T. Olive oil 2 Garlic cloves, minced

1 Medium onion, roughly chopped

2 Carrots, roughly chopped

2 Celery stalks, roughly chopped

1 Quart Chicken broth (or, if you cook your beans from scratch, try using the bean broth)

1 Butternut squash, peeled, seeded and roughly chopped (about four cups)

1 Head of kale, de-stemmed and torn into bite sized pieces

14 oz. Cannellini beans, cooked or canned, drained

Freshly ground black pepper

Salt

Method

In a large stockpot or Dutch oven, heat olive oil over medium high heat.

Add onions and cook for one minute before adding garlic and cooking for an extra two minutes.

Add carrot and celery and saute for five minutes.

Add broth and bring to boil before adding squash.

Cook until squash is tender (about 10 minutes); remove from stove and puree with immersion blender or in batches in a regular blender.

Return puree to stove and bring back to low boil; add kale and cook until tender (about eight minutes).

Add white beans, salt and pepper and cover, turning off stove.

Let stand for 10 minutes before eating.

Friday, March 4, 2011

Fennel Pepper Primavera

Winter farmers markets can be quite interesting. You never know what you're going to find. Case in point, my local winter's market, held the second Saturday of each month, has everything from fish to fowl, pickles to pastry, chutney to cheese. But the most popular vendor is the sole produce vendor. Seriously, the crowds are three people deep around the little stand. Why? Because of the variety and the prices. Last month, I fought the crowds and spent $20 at the stand, taking home: *Mint, cilantro and dill *A butternut squash *A bunch of kale *One huge fennel bulb *Three small sweet potatoes *A handful of red onions *A carton of radishes *A bunch of scallions *Four mild white bush zucchini The butternut squash and kale went into a soup, the herbs, scallion and radish into salads and the fennel and squash into a roasted primavera. Using a technique similar to roasted ratatouille, I chopped up the onion, fennel and zucchini with minced garlic and multicolored bell peppers (from Costco), drizzled with a glug of olive oil, and roasted in a 400 degree oven for about 25 minutes. I finished the "sauce" by dumping the contents of a large can of plum tomatoes (which I "chopped" while in-can, using kitchen scissors) into the roasting pan, turning off the oven and letting the residual heat finish the cooking. The end result was a rich primavera with a significant tomato flavor. Oven roasting concentrates the flavors of even the most pedestrian vegetables (bought at a farmers market or not). Use as a pasta topping or serve over polenta or even couscous. Now...what to do with three small sweet potatoes?

Wednesday, March 2, 2011

Lemon Macarons - Good taste, Technical Failure

Long time, no write. It's been a busy winter, but I have been going to the Union Square Green Market every Saturday. However, pickings are kind of sparse. My usual haul consists of apples or red onion or a similar cold weather storage kind of veg. Despite the hint of spring in the air, there are still few greens to be found (My "ramp watch 2011" has begun). So to capture a spring-like taste, I have been using a lot of lemons recently, and naturally decided to experiment with lemon flavored macarons. And once again, I learned how important macaron-making technique is. The batch was pretty much a failure. Oh sure, they formed a foot, were crisp on the outside and chewy on the inside, but too little liquid made the batter stiff, meaning: 1. The shell tops held small peaks, despite my attempts to pipe evenly 2. The shells did not spread at all, meaning my macarons looked more like cylinders than disks And the worse part is I know what part of the problem was! It was the darn meringue. I ignored my sugar water solution on the stove for a tad too long (it boiled down and began crystalizing again -- something I did not really notice until I pulled it off the burner). So I just threw in some more water without measuring. What I should have done was just started the sugar/water process over again. Despite my technical gaffes, the batter recipe is a keeper -- the super sweet base was tempered by the sour lemon. And the other good news is that I've learned from my mistake, and now hope you do too! Lemon Flavored Macarons with Lemon Filling Ingredients For the shells:6.5 oz. Almond flour, sifted 6.5 oz. Powdered sugar, sifted Zest of one lemon 5.3 oz. Granulated sugar 1.75 oz. Water 4 egg whites, separated into 2 containers of 2* For the filling:2 oz. Butter, softened 2 oz. White almond paste Juice of half a lemon Method A few hours to days ahead of time, separate four eggs, dividing the egg whites into two separate containers of two; store on the counter covered with a paper towel or in the fridge covered in plastic. Preheat oven to 320 degrees.** In a large bowl, sift together almond flour and powdered sugar until well incorporated; add lemon zest and two of the egg whites and combine well (at this point, the batter should look like a thick, sandy paste). In a small sauce pan, bring the granulated sugar and water to a simmer until it reaches the soft ball stage/240 degrees.*** Be careful not to let the solution boil down too much or the sugar will return to a crystallized state. In a medium bowl, start whipping the remaining two egg whites until frothy/at a soft peak stage; when the sugar water reaches a soft ball stage, remove from heat, pour into the egg whites and continue to whip until the mixture resembles shiny, marshmallow fluff (if beating by hand, you can actually feel the mixture continue to thicken). Fold the egg white fluff (aka Italian meringue) into the large bowl of almond sugar batter until well incorporated. Scrape the batter into a pastry bag and pipe out onto a cookie tray lined with parchment, counting “1, 2, 3, pause” to get small, uniform rounds. Let trays/parchment sit near an open window until a thin skin forms; place the cookie covered tray on top of an empty tray to create double insulation and bake one double-stacked tray at a time for 12-15 minutes. Remove parchment from trays and cool on a rack. To make the filling, cream together the almond paste with lemon juice until the paste loosens; add the butter and cream until well incorporated. Scrape the filling into a pastry bag and pipe onto half of the shells; sandwich together with a similar-sized unfilled shell. Pop the macarons in the fridge overnight to rest...and then enjoy! Notes: *I typically separate my eggs the night before baking and leave them in the fridge. **All ovens are different. 320 degrees is the sweet spot for mine. ***If you don’t have a candy thermometer and are brave or have asbestos fingers, you can test the solution by dipping your fingers into a small bowl of water, grabbing a pinch of the liquid sugar solution and plunging your fingers back into the bowl of water. If a soft ball forms as you rub your fingers together under water, the sugar water is ready!